Self-Hosting for Dummies
Recently, my student credits on Azure ran out.
So everything I had running there - which was an ubuntu box, many serverless functions, two static web apps (with static ips) and a small k8s cluster - now had to be transferred to a pay-as-you-go model. Smashing the numbers into an online monthly cost calculator spit out an amount I would rather not pay. That and 13 year old me’s dream of owning a Raspberry Pi sparked the idea of hosting my own web infrastructure. And why the hell not.
Great, we now have a Pi, what next?
STEP - 1 - Set up the Pi
Headless setup of the Pi is extremely simple. On your PC/Laptop,
- Simply grab Advanced Pi Imager as suggested by the official site and open it up.
- Slide your SD card in.
- Select the default Raspbian OS and location as SD.
- Now, hit ‘Ctrl-Shift-X’ to bring up advanced options.
- Put in your Wifi credentials and enable ssh as henceforth we will talk to the pi wirelessly.
- Set locale to your location to configure time. Although you can also do this later from within the Pi.
- Hit run.
Now plug the SD into your Pi connect it to your power supply. Give it 10-30 seconds to boot, then from your PC/laptop terminal, hit
If that fails, do,
nslookup raspberrypi.local
If the output of that looks like
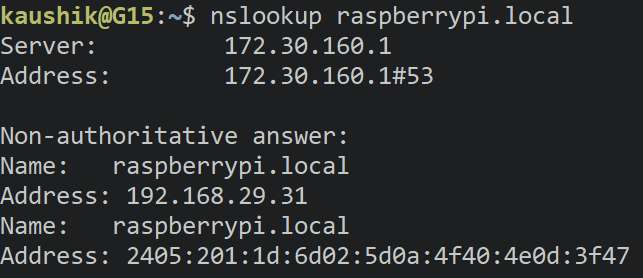
Grab your address corresponding to my 192.168.29.31 and do ssh pi@YOUR_ADDRESS
The password is raspberrypi.
Now, if you are logged into your pi via ssh,
(Which should look like this)
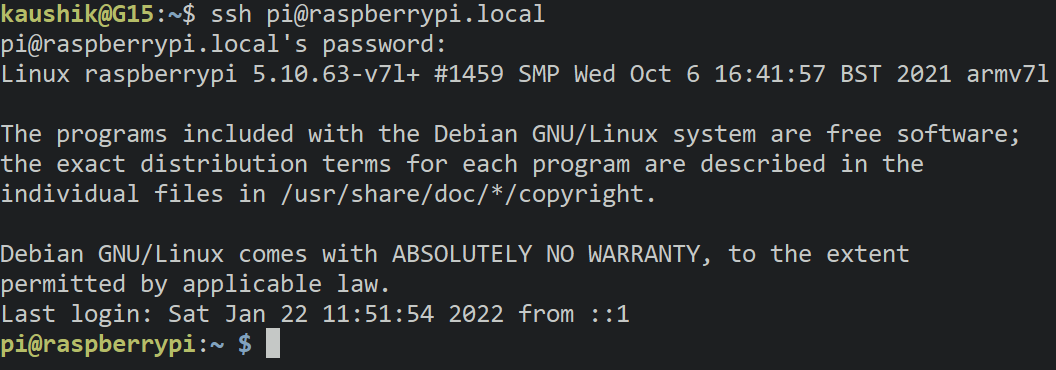
you should change your password. For this, hit passwd. Type in your old (raspberrypi) and new passwords as prompted.
STEP - 2 - Set up NGINX on your Pi
NGINX is our web server of choice, which will see the url requested by the client and serve the appropriate webpage. so something like http://musings.kaushik.me will take you to where I have placed the musings html in my Pi, while http://savvy.kaushik.me will take you to the code location of savvy.
To install NGINX, simply use
sudo apt update
sudo apt install nginx
If that fails, follow the official guide.
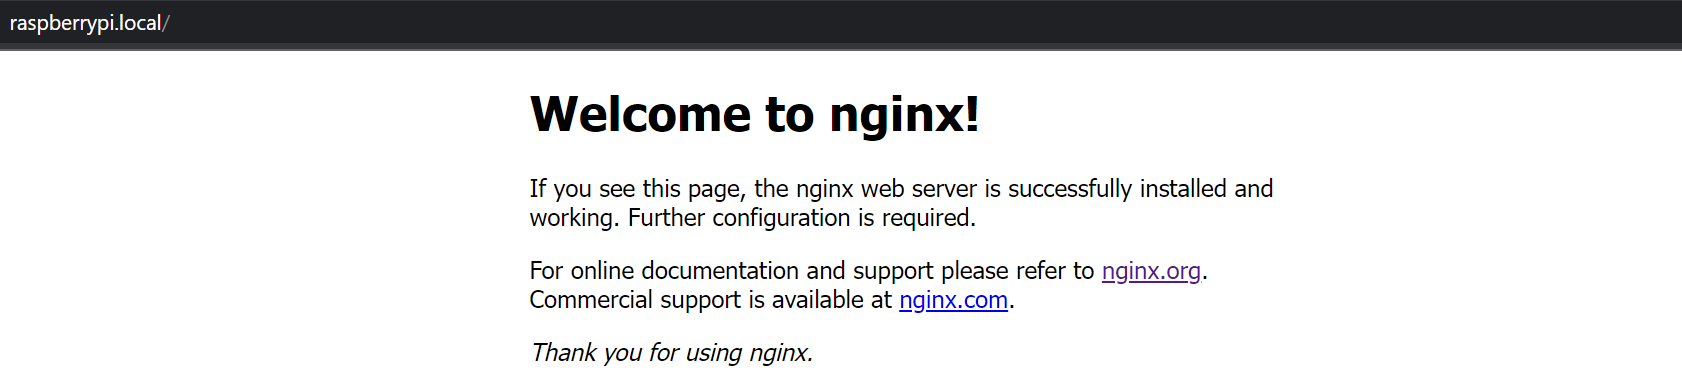
Once installed you can use sudo systemctl start nginx and access http://raspberrypi.local to confirm that our NGINX is running.
Now you can begin to configure your NGINX.
All your custom configuration must go into /etc/nginx/conf.d/server.conf. If that server.conf file does not exist then you may create it, and it will automatically be included (everything in conf.d is included by default) in the main config.
Use the official guide for more info into NGINX configuration.
My config looks like this
pi@raspberrypi:~ $ cat /etc/nginx/conf.d/server.conf
server {
    listen [::]:80;
    server_name musings.*;
    root /home/pi/sites/musings;

    location / {
        index index.html;
    }
}

server {
    listen [::]:80;
    server_name savvy.*;
    root /home/pi/sites/savvy;

    location / {
        index index.html;
    }
}
You may not be able to test virtual hosts for now since that url to not mapped to the raspberrypi.local IP, but we will be able to do that after the next step.
STEP - 3 - Explore Options for exposing your Pi to the Internet
Now would be a good time for me to give an overview of the process that follows. The IP you used to connect to the Pi in step 1 is a private IP. This is only valid when someone wants to connect to it from your WFI network. To expose your Pi to the public internet and reliably access it, you need a static public IP address. This is the most tricky part of our mission, and done conventionally, costs a good amount of money. However, our journey was born out of a need to save money. So we will try to achieve the same without paying a cent.
This can be done using Port Forwarding or Port Tunneling.
So assuming we have a server exposed to the public internet i.e, with a public IP, we can use Port Forwarding to “forward” all the requests from a port P1 of the server to a port P2 on our Pi. Our local NGINX server will be listening on the port P2, which will respond to this request with our webpage or API response which will also be forwarded back to the client.
Your options to do this is all follows:
- Option 1 - NGROK:
Running ngrok on your Pi will spit out a public url that can be used to connect to it from anywhere. However for a static url, a recent update made it pay-to-use. However, this is an age old solution worth looking into.
- Option 2 - Serveo
Serveo is a newer alternative to ngrok, which does the same thing but for free. This can be used if the next option is not suitable for you.
So when you use Serveo, the url spit out is of the form something.serveo.net, so in this option you are still relying on a third party to provide you access, which I wish to avoid. That is to say god forbid if serveo.net goes down, or they take down the free tier, you’re screwed. If this is not a valid concern in your case, this is a great choice.
- Option 3 - Using an AWS/Azure free tier VM
Our last option, and my option of choice, is to use the free tier AWS or Azure VM - that is by default given a public url (however if shut down and started up again, this url changes) - to act as the port forwarder for our Pi. Both providers offer 750 hours of VM use per month for 12 months exceeding which you must pay an hourly rate (around 0.01 dollars).
However after 12 months you can move to the lowest tier (t3a.nano) on AWS which costs close to 0.0047 dollars an hour, working out to 3.5 dollars a month, which is cheaper than ngrok with added benefits such as accessing your pi from anywhere (by tunnelling to port 22) and while ngrok only allows one online process, here you can have as many as you want with NGINX to handle the routing.
This guide will henceforth follow option 3 with AWS.
UPDATE JAN 01, 2023: My AWS free tier also recently ran out and I started hunting alternatives once again. I have now opted to use Cloudflare Tunnels, which work amazingly since my domains were already on cloudflare and they have fantastic DNS integration in their CLI tool, cloudflared. Refer to these docs. For cloudflare ssh tunnel refer to this guide. I would suggest you to use this as Step-4 instead of the following process.
STEP - 4 - Spin Up a Free Tier EC2 and set up Port Forwarding
Sign up for AWS and use https://docs.aws.amazon.com/AWSEC2/latest/UserGuide/EC2_GetStarted.html to spin up a free tier vm.
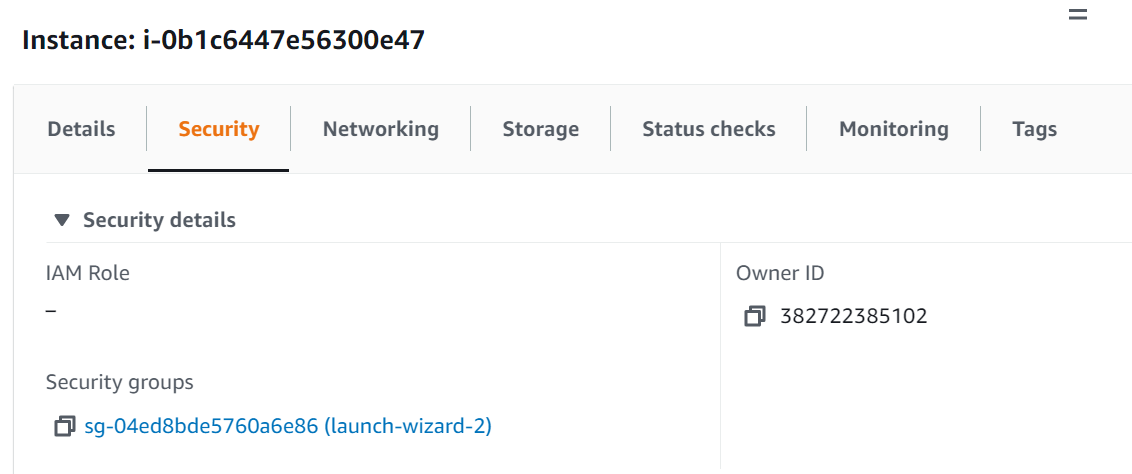
Once that is done, navigate to the ec2 tab of your aws console. Click on the instance’s row, then click on the security group id
We will now edit our Inbound rules to open two ports for our server. Click on edit inbound rule.

then add two rules opening port 8080 for custom TCP and port 80 for HTTP traffic. Your configuration should look like this.

Cool you can now ssh into your EC2 and install NGINX using sudo yum install nginx.
Then you need to copy your EC2 ssh key from your local machine to your Pi using scp.
scp /something/something/myrsakey.pem [email protected]:~
Now get your EC2’s url from here,

And in another terminal tab, ssh into your Pi, and run this command to enable port forwarding from EC2 port 8080 to Pi’s port 80.
/usr/lib/autossh/autossh -M 0 -N -R 8080:localhost:80 -v -o "StrictHostKeyChecking no" -o "ServerAliveInterval 30" -i /something/something/myrsa.pem ec2-user@YOUR_EC2_URL
Henceforth the requests to YOUR_EC2_URL:8080 will be forwarded to port 80 of your Pi.
I have used port 8080 because port 80:localhost:80 was throwing an error. So you can make a small change to the default EC2 nginx config to redirect all requests that its port 80 recieves to 8080.
[ec2-user@ip-172-31-38-69 ~]$ cat /etc/nginx/conf.d/default.conf
server {
    listen       80;
    server_name  _;

    #access_log  /var/log/nginx/host.access.log  main;

    location / {
        proxy_set_header   X-Forwarded-For $remote_addr;
        proxy_set_header   Host $http_host;
        proxy_pass         "http://127.0.0.1:8080";
    }

    #error_page  404              /404.html;

    # redirect server error pages to the static page /50x.html
    #
    error_page   500 502 503 504  /50x.html;
    location = /50x.html {
        root   /usr/share/nginx/html;
    }

    # proxy the PHP scripts to Apache listening on 127.0.0.1:80
    #
    #location ~ \.php$ {
    #    proxy_pass   http://127.0.0.1;
    #}

    # pass the PHP scripts to FastCGI server listening on 127.0.0.1:9000
    #
    #location ~ \.php$ {
    #    root           html;
    #    fastcgi_pass   127.0.0.1:9000;
    #    fastcgi_index  index.php;
    #    fastcgi_param  SCRIPT_FILENAME  /scripts$fastcgi_script_name;
    #    include        fastcgi_params;
    #}

    # deny access to .htaccess files, if Apache's document root
    # concurs with nginx's one
    #
    #location ~ /\.ht {
    #    deny  all;
    #}
}
the proxy prefixed lines are the changes to be made.
STEP - 5 - Get a domain name and configure DNS
I personally signed up the Github Student Developer pack a few years ago and got kaushik.me for free, along with several other benefits. I highly recommend that.
Regardless, a domain will let you set up virtual hosts and is easier to access than the long default ec2 url. So once you have the domain you can configure DNS.
My DNS config looks like this

Simply CNAME all your vhosts to your EC2 url.
And voila, http://musings.kaushik.me will now be a valid url redirecting to my blog. And at this point you can now test your Pi’s NGINX config with vhosts.
NOTE: I have added the autossh command to my crontab (using crontab -e), so if the pi is ever rebooted, the tunneling will be reinitiated.
 @reboot sleep 10; nohup /usr/lib/autossh/autossh -M 0 -N  -R 8080:localhost:80 -v -o "StrictHostKeyChecking no" -o "ServerAliveInterval 30" -i something/something/myrsa.pem [email protected] >/home/pi/logs/site.out 2>/home/pi/logs/siteerr.out &
@reboot sleep 10; nohup /usr/lib/autossh/autossh -M 0 -N  -R 2222:localhost:22 -v -o "StrictHostKeyChecking no" -o "ServerAliveInterval 30" -i something/something/myrsa.pem [email protected] >/home/pi/logs/ssh.out 2>/home/pi/logs/ssherr.out &
With this setup the ssh is also forwarded so now I can ssh [email protected] -p 2222 to ssh into my pi from anywhere in the world. (Dont try this since I have changed the password.)
That’s it! If you made it this far, Congratulations! you can now reap the benefits of your very own web infrastructure and make it do whatever you want, for free!